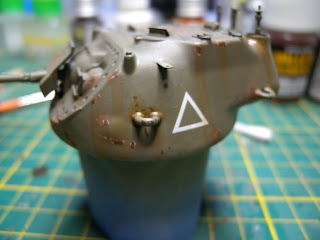
The method below will describe adding the chipping effect to a World War 2 Allied vehicle, and is an easy way to add that realism of a used vehicle. As most Allied vehicles were primed with a either a grey or light coloured primer under the olive drab or camouflage.
The chipping effect is usually one of the first step in the weathering process, because as the vehicle ages, so do the chips. I normally start with an off-white or very light grey color, adding little "spots" where normal chipping may occur. I do this with a 00 or 000 brush for best effect.
Once happy with the location and look, even though it may not look like much now, I let the light paint dry, usually over night.
The next step is to add the actually chip colour, for this I use True Earth Dark Rust Chipping, and to vary it I add a little Vallejo German Grey. Again, using a small brush, I go back at the light colour splotches I have done and adding the chipping colour to them, allowing some of the light colour to show.
After this, I usually only give the paint about an hour to dry. Now using AK Interactive Rainmarks with a slightly larger brush I begin to "pull down" the pigment to give a rust run off effect.
I do this in a sort of sweeping motion, lifting the brush away as I move down. Don't worry about the harshness of the effect, as further weathering will start to soften it.
And there you have it, an easy and quick method of chipping Allied vehicles.


No comments:
Post a Comment